This tutorial is all about external ActionScript 3 classes. I will teach you how to linkage movie clips to an ActionScript class and then we’ll create an external class.
The end product in seen above. The movie uses one external class and only a few lines of code is written in the main timeline. So why do we use external classes? To put it simple, external classes help you to stay more organized. External classes are part of a programming paradigm called “object oriented programming”. The subject is very broad, so I will not go into that. In this tutorial, you don’t need a great knowledge of OOP anyways. SO start your Flash IDE and let’s get started!
Setting up the environment
1. Create a new document of size 300×300.
2. Draw a star on the stage. The polystar will help you in that.
3. Convert the star into a movie clip. Give it a name “Star” and set the registration point to the center.
4. Linkage the movie clip to a class named “Star” (right click the movie clip in the library and select “Linkage”).


Don’t worry about the ActionScript Class Warning. It warns you, because Flash can’t find a class named “Star”. That’s normal since we haven’t created that class yet!
5. Remove the star from the stage.
Moving into ActionScript 3
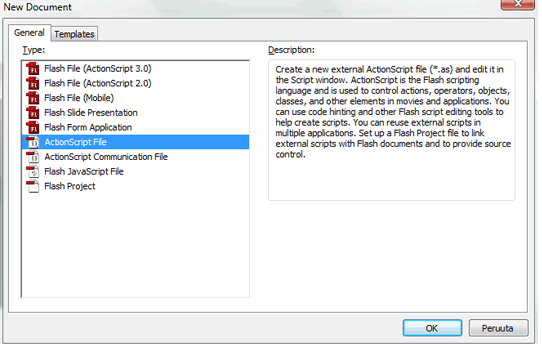
6. Create a new ActionScript file.

7. Type the following in the class
8. Save the file as “Star.as” in the same directory where your main movie is (this is very important!). The movie won’t work without the correct file name and location. File names must always be the same as the class name.
9. You can close the ActionScript class now. Go to your main movie and type the following code in the first frame.
10. You are done, test your movie! I hope you enjoyed this tutorial and learned something from it. If you have any questions concerning this tutorial, please visit the forum. Have a nice day!
 Blog RSS Feed
 Via E-mail
 Twitter
 Facebook
No comments:
Post a Comment